Acrylic Paint On Glass UK.

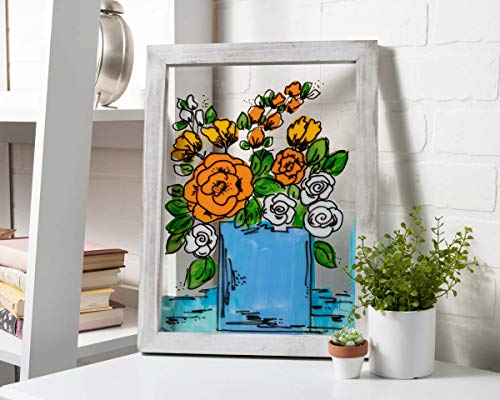
A guide to painting on glass with acrylic paint
For people who love to paint, a major plus is the versatile nature of acrylics. This art medium can be used on glass as well which makes it even more desirable for some artists looking to experiment with new textures and surfaces in their work!
These paints are so easy to work with, thanks to their thick consistency! You can use them on the smoothest surface and they’ll still adhere.
Products Featured In This Article
No Results Found
The page you requested could not be found. Try refining your search, or use the navigation above to locate the post.
Ever been interested in painting on a glass surface with acrylics?
These paints are so easy to use! You’ll be able to make amazing art in no time.
In this article, I’m going to explore the concept of acrylic painting on glass. What are these two mediums? How can they be used together and by combining them in certain ways how you will create your own masterpieces!
Can You Use Acrylic Paints For Painting Glass?
Acrylic paints are perfect for anyone who wants to paint on glass. They are popular due to their drying time, ease of use and application, long-lasting properties and they come in a range of colours.
When selecting which to use, most acrylic paints will do the job, but an artist should opt for an enamel type of paint for glass, as these are durable and work best on smooth surfaces.
It is however still important to prepare the glass well before you paint it. You can do this by making sure you don’t have any dust, dirt or oil on the glass before you begin painting.
Another good tip at this point is to also use a primer to make sure the acrylic paint sticks well to the glass.
Then once painted you can finish by protecting the paint with a sealant or varnish to help it last longer.
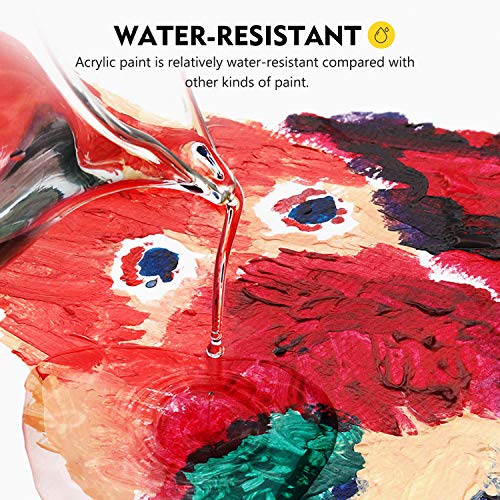
Acrylics are a great painting medium because they’re water-resistant, durable and easy to clean up. This makes this type of paint a happy choice for beginners through to experienced artists, no matter what kind of materials you are working with.
Disclaimer – This website contains affiliate links. If you find the information useful and click on a product link and make a purchase, a small commission will be earned by Big Red Illustration
Will Acrylic Paint Stick To Glass?
This is the big question that everyone asks…the answer, yes, acrylic is perfect for painting glass, although this does not mean that it will adhere easily.
For the best results, when glass painting with acrylic paint, it is best to provide a primer base to which the paint can stick. If using an enamel-based paint then this should be an enamel-based primer.
When applying the primer, you can use a brush or sprayer; letting this layer dry for 24 to 72 hours before beginning your painting.
Priming the glass in such a way will create a rougher surface which in turn will make your paint stick fantastically onto the glass.
There is some permanent acrylic paint that can be used directly to paint glass, but it is usually a good idea to use a primer first regardless.
Selecting The Most Suitable Acrylic Paint
Now, you might think that all acrylic paints are the same. You would be wrong!
When looking to choose the most suitable acrylic paint for your glass surface, you should consider a few points first.
Does this artwork need to be permanent or is it one that needs to be washed off in time? In general, if you want to make glass art, then it’s best that your paint is as long-lasting and durable as possible. if this is the case then an enamel-based acrylic paint is your best choice.
Here Are Some More Considerations To Make When Choosing The Right Acrylic Paint For Glass.
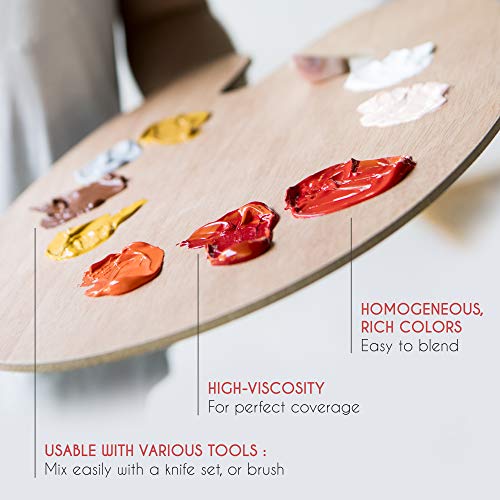
Transparency
One important thing to look at is the transparency or opacity of the paint, as the more solid you make your colour – it will be brighter and denser.
This choice comes down to personal taste but with painting on glass, it is a very important one as transparent colours will let the light shine through, and opaque ones block out any light.
Lightfastness
What is lightfastness?
Lightfastness refers to the permanence of the paint’s pigment when exposed to sunlight. A paint that is lightfast will be more resistant to fading due to the sun’s UV rays. Colours that are not lightfast are referred to as ‘fugitive’ and will fade over time.
Consistency
If you’re going to use different types of paint, they’ll need a similar consistency. Therefore never mix two paints with different consistencies, otherwise expect the result to be that of an inconsistent painting.
To avoid this, simply test two different paints to judge how thick or thin they are, comparing the small amounts of each next to each other.
Painting with different consistencies results in different finishes which will look odd and unprofessional.
Finish
Finishes consist of glossy, matte, and frosted, each being unique. Once again the finish is a personal choice; some artists opt for a frosted finish on glass, as glossy finishes can become too reflective.
- To obtain an opaque finish or thick coat, choose a glossy enamel paint
- And for a lighter, thinner coat, use frosted paints
- For anything in between maybe try a crystal gloss paint enamel, which provides a combination between the glossy and the frosted
- If it’s a matte, opaque finish you require then perhaps look at a gesso and acrylic paint combo. This can actually look like canvas if painted onto a flat piece of glass
- There are special glass acrylics available but glass primers and enamel acrylic paint work equally as well.
Best 5 Acrylic Paints For Painting Glass


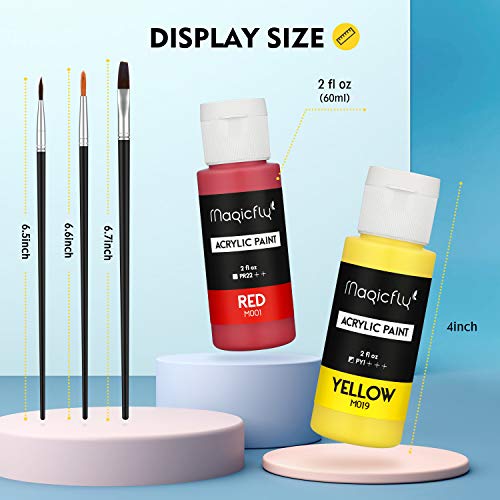

1) Magicfly Acrylic Paint Set
About
- 2fl oz/60ml Bottle
- 20 Colours Acrylic Craft Paint
- 3 Brushes
- Acrylic Art Paint
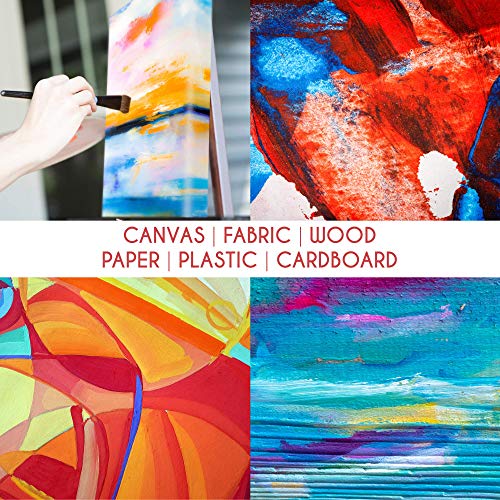
- Canvas, Glass, Wood, Stone, Ceramic & Model
- For Artists, Adults & Kids
This paint set contains 20 different colours of acrylic paint perfect to start your art project and keep it going. The paints are high quality so that you can enjoy your painting process and are easy to use. They dry reasonably quickly which makes painting a fun and stress-free experience with little waiting time.
It’s also safe for children to use because it lacks the smell that most paints have which can be harmful to kids. The colours are vivid and the package comes with some paintbrushes included, so you can start painting right away.
On the downside, the paint brushes were not the best quality but good that they were included for beginners to get started. The paints were a little thick too so for some projects it may be advisable to thin them first.
Overall these paints will not only help you create amazing artworks but will also bring out your artistic side as you experiment with the amazing colours on a variety of different surfaces.
2) Hapree Stained Glass Paint
About
- Palette Included
- Transparent Glass Window Paint
- Acrylic Paint Set
- Great for Wine Bottle, Light Bulbs, Ceramics
- 12 Colours x 12ml
- Titanium white, mid yellow, orange yellow, rose, crimson, light green, viridian, cerulean blue, deep blue, violet, burnt umber, black.
As an artist, I love working with new mediums and was excited to try out the Hapree Stained Glass Paint. The 12 colours are vibrant and will suit stained glass projects well. When I was painting, I had no issues with the paint running or dripping between coats.
Even though it takes some time to dry before you can apply more coats, it’s worth it because the final result doesn’t have any brush strokes when you use enough paint.
If you want to build up layers and are prepared to wait between coats, this is a great product.

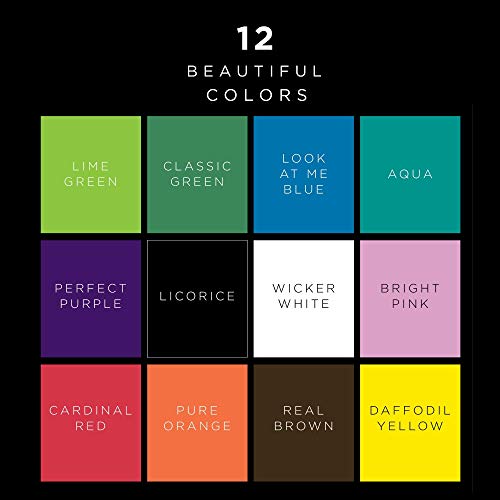
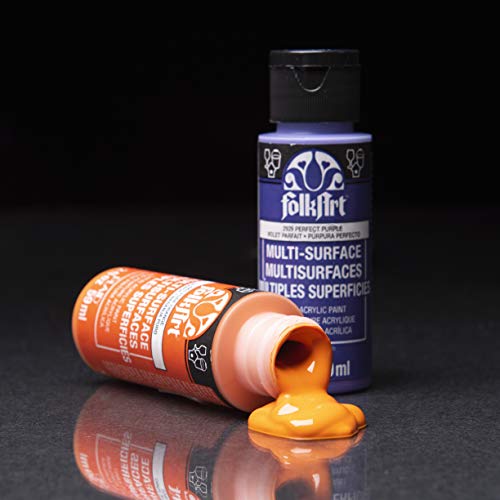

3. FolkArt PROMO830
About
- Multi Satin Finish Acrylic Craft Paint Set
- Designed for Beginners and Artists
- Non-Toxic Formula
- All Surfaces
- 2 oz
- 12 Assorted Colours
On to American made “FolkArt PROMO830” – Suitable for professional artists or beginners. I found that the colors are vibrant and the set includes 12- 2 oz bottles which is perfect for smaller projects.
The finish is satin rather than gloss when dry and it’s easy to apply. Of course, it’s possible to apply a gloss clear fixative after the project is complete if you prefer. To clean up after is no trouble at all with this paint because they are water-soluble until they dry as you’d expect. My only complaint is that some of the colors didn’t cover perfectly straight away and took an extra coat.

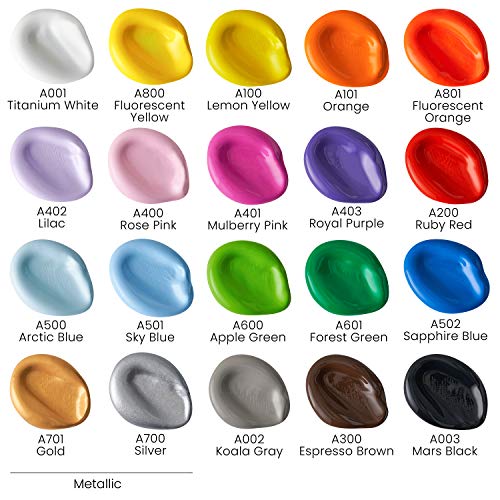
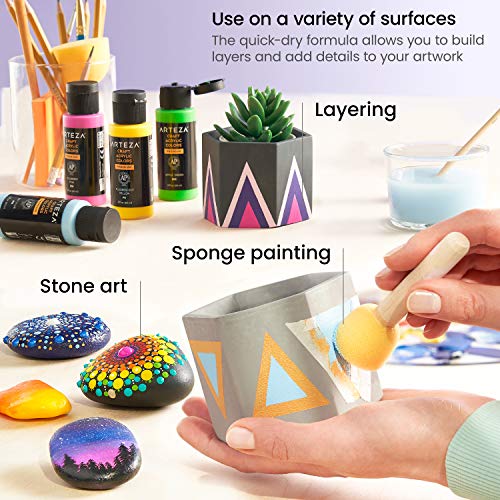
4. Arteza Craft Acrylic Paint
About
- Set of 20 Colours
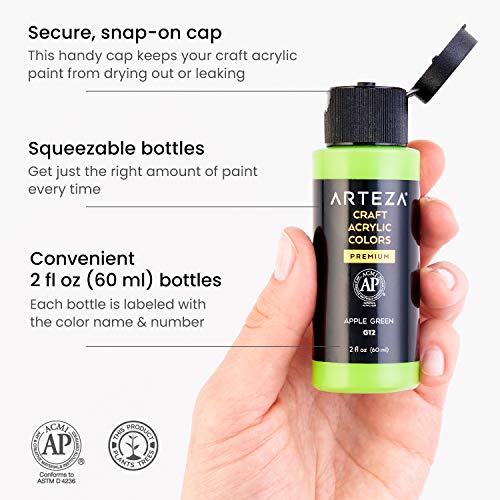
- 2oz/60 ml Bottles
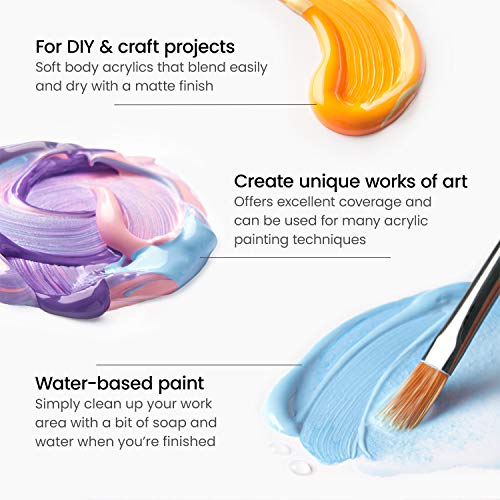
- Water-Based
- Matte Finish Paints
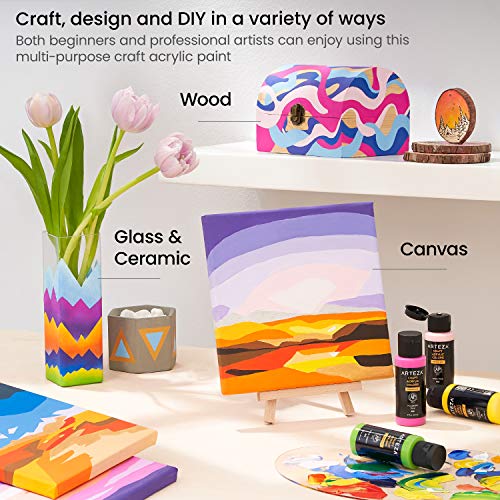
- Art Supplies for Art & DIY Projects
- Perfect For Glass, Wood, Ceramics, Fabrics, Leather, Paper & Canvas
When it comes to Atenza, I’ve bought lots of other products from this brand and have always been very happy with the quality they provide. This is why when I saw the Arteza Craft Acrylic Paint Set of 20 Colours 2oz/60 ml Bottles, I knew that it would be a great product to pick up. And with the price being so affordable, it was a no-brainer.
When applying to glass they covered the surface well with the first coat, but layering for a deeper color is also possible. They are just the right consistency – not too runny and not too thick either.
Another great product from Artenza, top marks.


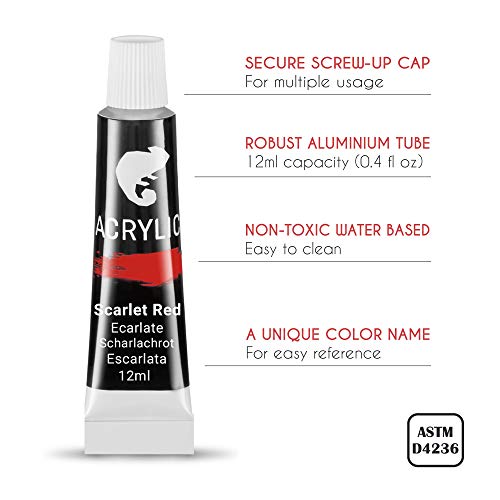
5. Zenacolor Acrylic Paint
About
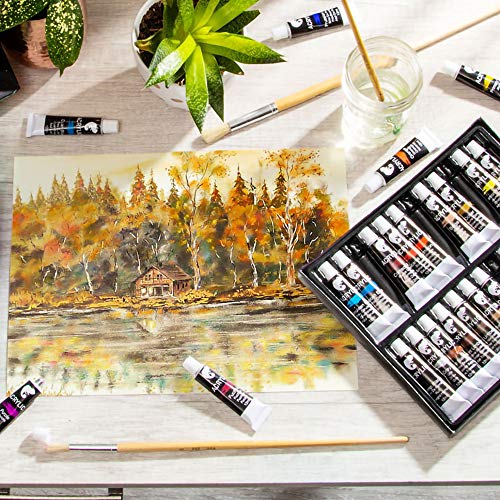
- Set of 24 Tubes
- 04 oz / 12-mL
- For Adults & Kids
- Painting on Canvas, River Rocks, Glass, Wood, Fabric, Ceramic
Last up, the Zenacolor Acrylic Paint set is a good affordable set. The colours are bright colours and they are water-based so they clean up really easily.
As they are suitable for a good range of surfaces, you are not limited to working on glass, so you can let your creativity go wild! They are non-toxic and therefore perfect for kids.
When they arrived the box was slightly damaged, but the paints were perfectly fine so wasn’t a big problem. Great value for money, they dry quickly and I was able to get the results I wanted.

Choosing The Best Paintbrush For Acrylic Paints.
- The big thing to remember is, don’t go with natural fibres (aka natural hair bristles) for use with acrylic paint. very important in the painting process.
- Paintbrush size is also important. Some brush sizes have thinner bristles for detailed work while others are thick and durable. This can be a consideration when dealing with visible brush strokes. So a good tip is to select the size wisely and paint thinner on your glass surfaces during the painting process to avoid this
- Sponges can provide a unique, textured finish over your finished painted glass items, which can offer an even and slightly frosted look.
** Read the full review on the best acrylic paint brushes here **
Which Glass Is Best To Paint On With Acrylic?
When looking at types of glass, COE is an important factor to take into consideration (coefficient of expansion). This term relates to how much glass expands or contracts when heated or cooled and can determine whether the acrylic paint will have enough flexibility not to crack when this occurs.
When baking the glass this becomes even more important. As you might imagine, thick glass tends to be stronger, whereas one that is thin (e.g. wine glasses) is more flexible, and obviously thinner and thicker glass both have their pros and cons
So with a thick painted glass piece such as bakeware, being less flexible, it may crack the paint when expanding. And with thinner glass being more flexible, (such as wine glasses) it is, therefore, more sensitive to temperature fluctuations.
Just because thin glass is flexible, doesn’t mean it can take the heat! Painting on acrylics at home should be limited to smaller pieces of flat glass. Larger items will need a professional kiln for baking them properly and additional care to avoid any potential damage in transit or storage.
Required Materials For Acrylic Paint On Glass
To achieve great results when using acrylic paint on glass please use the materials from the list below:
- The piece of glass itself – this can be a flat glass plane, a decorative glass item or simply a piece of glassware
- Rubbing alcohol ( with either cotton balls, soft cloth or paper towel) – to allow the glass to be cleaned properly before applying the acrylic paint.
- Paintbrushes – please read my review on best acrylic paint brushes UK
- A Palette – for mixing your acrylic paints on
- Your design or pattern – if required
- Acrylic enamel paints/glass paints – ideal for use on glass
- A clear acrylic medium – for thinning your paint. When applying paint to non-porous materials (i.e. glass) it is recommended that water not be used
- Masking tape – to protect areas you don’t wish to get paint on
- A glass outliner – to create a stained glass effect
- Specialist glass marker pens – for extra fine detail and/or writing
- Acrylic sealant/varnish – to protect your work and allow it to last longer. If food is to be used with your finished glass item, please ensure the varnish is labelled as being ‘food safe’
Tutorial For Painting On Glass With Acrylics
There are a number of different methods you could take when painting acrylic paint on glass surfaces. This could be freely, by hand or to make use of a pre-designed stencil. Here are the steps I take when working with acrylic on a glass surface.
01) Preparing The Glass
How does acrylic paint adhere to the glass? The first point of call is to get the glass prepared. Wash with warm soapy water using a damp microfiber cloth and wait to dry. Once dry, wear latex gloves and apply rubbing alcohol using cotton wool or paper towels. The gloves will prevent finger marks from being left behind.
Tape off any areas of the glass that may come into contact with your mouth when drinking. Always best to avoid painting these areas as often the paint will chip off and deteriorate more quickly from such places.
Next is to prime the areas of your glass that you intend to paint over. Then allow to dry from between 24 and 72 hours.
Once dry you can then apply a base coat.
Please ensure this is completely dry before moving onto additional layers (this usually takes around an hour) or otherwise the added paint is likely to bleed into the original base layer.
- Please note, for an opaque effect, paint a couple of layers of gesso as your base coat.
- Or, if you simply want to add a detailed decorative design to a clear piece of glass, please skip the priming and basecoat stages
02) Next Is To Start Painting The Glass With Acrylic Paint
Now that your glass is properly cleaned, primed, it’s ready for painting. Here’s where you can start to apply your design. If you haven’t done so already, it may be a good time to draw out your design to give you something to work to and get your paint bottles lined up ready to go.
Draw or trace the outline of your design using a marker onto the glass surface. This outline can be used as a guide when painting. If a base coat hasn’t been applied your glass may well be transparent which will allow you to use tape to stick your stencil or design onto the inside of the glass, which you can then simply trace.
This method can also be used when applying glass liners as well. Simply squeeze the bottle gently and trace the outline as precisely as you can.
Don’t worry about how the marker interferes with the look of the design. If the design doesn’t cover it, you can wash it off once you’ve finished painting.
Now onto the glass painting part itself…
Select your chosen brush and start work with a single glass paint colour. Work from the furthest part of the glass from you using light strokes. You can then increase the pressure if necessary.
When changing colours, make sure you clean your brush thoroughly. If you’re using enamels you may need to apply thinners too, drying off with a paper towel before adding the new colour. After switching colour, try not to blend into the previous colour accidentally, you’d be better off letting the first glass paint colour dry completely to avoid this. Working in this fashion will keep your blocks of colour clean, with nice sharp edges.
If you make any mistakes, these can be erased using cotton buds soaked in rubbing alcohol or acetone.
This easily rubs out mistakes on smooth surfaces and works really well when trying to delete small detailed errors. Painting a second coat for brighter, more enhanced colours is also an option. Acrylic paint can appear lighter once dried, so that second coat just helps the colour to pop. Obviously, ensure sure you use exactly the same colour.
03) Tips For The Design
Various finishes and effects can be achieved when painting glass by using the different brushes and creative painting tools available. Below are some great tips for you to try:
Tape a pattern on the inside of the glass then trace over the outside – it’s as easy as that
To paint straight lines or paint stripes, use tape as a marker. Using a flat brush, paint over the edge then, whilst the paint is still wet, remove the tape to avoid peeling off or chipping the paint. If you get any poor edges, simply clean up using a sharp, craft knife.
Using a dauber or large sponge will allow you to paint large polka dots and spots. Otherwise, try using any small handle or point as an alternative on your glass artwork. Simply add the acrylic paint to the tip and press onto the glass and there’s your perfect dot.
Any of these tips work well from painting on a wine glass to painting plates. Just start painting!
04) Allow The Paint To Dry
As you may or may not know, all paints have different drying times. In general, acrylic paint on glass will take approximately 1 hour to air dry. However, with enamel paints, this can be as long as a full week to be fully cured. Leaving the glass in a warm area that gets the sun will help this process. Does the acrylic paint adhere to the glass once fully dry? Yes and by baking or adding a sealant can help with this too. Applying a sealant can also help by adding additional protection.
05) Maintaining Acrylic Paint On Glass Over Its Lifetime.
When you paint glass with enamel based acrylic paints it requires special care to help ensure a long lifespan even though they are extremely durable.
Ideally, you want the finished piece to be dishwasher safe but this will depend on the exact acrylic enamel paint used.
Always remember, never soak these items and certainly never ever scrub them with anything abrasive.
Always read the manufacturers recommendations first. General good practise is to wipe down the glass with a damp clean cloth. Using the glass often with continuous washing will result in the paint deteriorating over time.
06) How To Seal Your Acrylic Painting On Glass
There are three ways you can seal your piece of glassware. Either by covering it with a sealant, baking it, or by doing both.
With many sealants not being food safe, a sealant is recommended for decorative pieces that will not be used for food or drink.
To obtain the most protection possible, people opt to oven-bake their glass, after which they then apply a sealant for maximum protection and longevity.
Sealing Acrylic Paint On Glass Using A Sealant
There are two ways to apply a sealant to your painted glasswork, either by spraying or by applying with a brush.
I personally prefer the spray-on sealers as they require less direct contact with your newly painted piece. This limits the possibility of smudging if the paint is not completely dry.
Always ensure that you read the product manufacturer’s instructions on how to use it regardless of which sealant you use.
Tips When Using A Sealant
- Work in an open and airy area. Most sealants create toxic fumes and strong odours, so it is best to seal your glass piece in a well-ventilated space.
- When using a spray-on sealant, spray gently from at least 30 cm away from the surface. Try to use a sweeping motion to cover the whole area and avoid spraying over a certain area for too long to ensure an even finish.
- Allow approx 15 minutes between layers, to allow the previous chance to dry (although this can vary according to the manufacturer’s instructions). To fully seal your glass you’ll probably require two-three evenly sprayed coats
- When using a brush-on sealant, apply a thin, even layer of sealant over your finished glass surface using a paintbrush. Allow any excess mixture to drip off the brush before applying it to the glass.
- Use a back-and-forth motion with the brush to apply the sealant. This should leave a thin and even coat.
- Using a brush will also require two-three coats as with a spray. Allow each layer time to dry before applying the next. With the coats being slightly thicker when applied with a brush these layers tend to take longer to dry than spray-on ones. Make sure you take this into consideration when if time is a factor.
- Once the final layer of sealant has been applied, leave for 24 hours to fully dry.


Best Spray On Sealant
Having tried many sealants throughout my career I currently recommend: ALEENE’S Spray Gloss Finish as the Best Sealer for Spraying
This product by Aleene’s is an easy to use sprayable sealant which produces a fantastic strong finish.
Working well both indoors and out, the sealant dries to a glossy, clear shine, is CFC free, and is easy to apply and work with.
It’s also a UV protected sealant that dries very fast, which means it can be left outside without it yellowing due to exposure to sunlight.
The finished piece is a long-lasting, glossy clear finish with an added layer of great durability.
PROS
- Fast-drying spray-on sealer
- UV-protected coating. Doesn’t yellow over time so perfect for indoor and outdoor projects
- Dries to a glossy, clear finish
- Durable protective finish
CONS
- Strong fumes and odours are emitted when spraying this sealant. Always wear a respirator mask when using this sealer


Best Brush-On Sealer
…and here is my recommendation for the best brush on sealant: MOD PODGE Sealer and Finish
Offering a unique formula, this sealer from Mod Podge can be used as an adhesive as well as a clear, strong sealing finish.
It is a water-based product and although dishwasher safe it isn’t food safe.
Using suitable synthetic brushes this is great for use on multiple small projects or large enough to cover one large piece.
PROS
- A glue, a sealant, and finish – all in one
- Dishwasher safe
- Easy to use – quick-drying
- Great value for money
CONS
- Full curing time is very long
- Not food safe
How to Oven-Bake Acrylic Paint onto Glass
Acrylic paints often come with instructions on how to oven bake and what temperature is best suited so be sure to follow these instructions.
As the glass needs to heat up very gradually to prevent damage always place the item in a cold oven and never place it directly into a hot oven.
If no instructions are available, then setting the oven to around 300 to 350 degrees Fahrenheit and baking the glass for about half an hour once it reaches the correct temperature should be sufficient.
After you’ve baked the glass for the required 30 minutes, turn the oven off, and leave the glass inside it to cool down….and only open the door and take out the glass once the oven has completely cooled down.
Tips and Tricks for Oven Curing
- Check for cracks or chips in the glass. If there are, there’s a high possibility that the glass will shatter in the oven
- At the start of the process, spraying the glass with a coat of all-purpose primer or sealant will help the acrylic paint stick to the glass
- Always try to wear gloves when painting on clean glass. This prevents leaving unsightly fingerprints and unwanted marks on the glass. Also, the natural oil from your skin can affect how the paint sticks to the glass
- Handwashing the finished glass items is still best even though glass items are generally dishwasher safe after being baked in the oven. Always be careful washing your painted glass, and use a very soft cloth and nothing abrasive
- Only use a chemical sealer on decorative items. Glassware for food or drink should be cured in the oven
- Avoid painting in areas where there will be direct contact with food or drink consumption when painting the glass. For example, tape over the rim of a drinking glass so that you don’t paint where you’d put your lips. Not only will this protect the paint, but it will also stop you from ingesting paint that might peel off. Alternatively, you can paint the reverse side of the glass piece
- Do not paint on recycled glass as it contains different glass materials and soda ash which lowers its COE. Always better to go for, new glass which is much stronger
Frequently Asked Questions
Does Acrylic Paint Stick to Glass?
Can you use acrylic paints on glass? Yes, due to acrylic paint being one of the most versatile art mediums, you can use them on almost any surface, including glass. It is, however, a good idea to apply a base coat or primer to the glass before painting.
Do You Need to Seal Acrylic Paint on Glass?
Regarding sealing your painted glass, in general, baking it in the oven should be enough. However, to increase their durability and longevity you can also apply chemical sealant coating to non-food items
How to seal acrylic paint on glass depends on the type of paint as well as the type of sealant.
Can You Seal Acrylic Paint on Glass Using Mod Podge?
Mod Podge works as a glue, sealer, and finish as is known as a decoupage medium. It dries clear, giving your glass a top-notch protective coating.
Do you Have to Prime Glass Before Applying Acrylic Paint?
Priming glass or using a base coat is not always necessary for painting acrylics on glass, however, it will certainly assist in improving the adhesion of the paint to the glass surface.
For best practice, always ensure the glass surface is completely clean and free of any dust, oils, and impurities. The entire glass surface must be completely dry as well.
Can Acrylic Enamel Paint be Used on Glass Windows?
Yes. Either paint your design directly onto your window panes or by using a glass outliner, create a stained glass painting effect.
Can Previously Painted Glass be Reused?
It is possible but it’s not easy.
First, you’ll need to use a solvent to dissolve the enamel paint off the glass surface.
Bear in mind that if you reuse glass for acrylic painting, you’ll need to repeat all of the steps as you would for a new glass piece.
Affiliate Disclosure
In compliance with the FTC guidelines, please assume the following about all links, posts, photos and other material on this website:
Any/all of the links on this website are affiliate links of which The Big Red Illustration Agency receives a small commission from sales of certain items, but the price is the same for you.
www.bigredillustrationagency.com is a participant in the Amazon Services LLC Associates Program, an affiliate advertising program designed to provide a means for sites to earn advertising fees by advertising and linking to Amazon.com & Amazon.co.uk. Pages on this site may include links to Amazon and its affiliate sites on which the owner of this website will make a referral commission.
Cookie preferences: cookie preferences
Adam has made a name for himself in the illustration industry and is a passionate blogger and writer on the subject of art, illustration and graphic design.
His artwork has been featured in countless publications and used for very well-known media projects. As a professional illustrator for over 20 years, Adams media outlets, a wealth of knowledge, and experience enable him to consult and advise artists and illustrators in this country (from York and Manchester to Southampton and London) and all over the world.


